Introduction
The Risk Safe plugin for Jira allows a simple and effective management of the risks that can affect a project issue.
Here's a short list of the features you may find:
- Easy risk entry giving the option of entering a probability and an impact for each risk. A risk criticality is computed function of those two parameters;
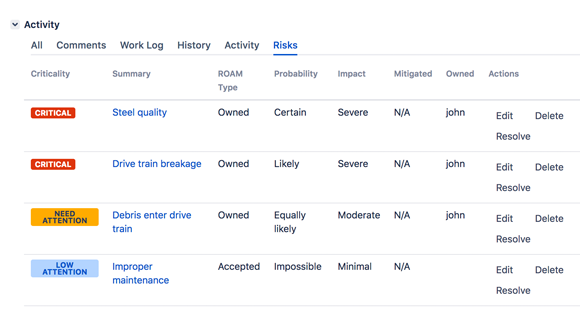
- An overview of the risks affecting an issue is displayed to the user in the "Risks" issue panel;
- Risks are always sorted by their criticality: the ones which are more important come first!
In Action
The following youtube video should demonstrate how easy it is to start working with Risk Safe and take advantage of its features.
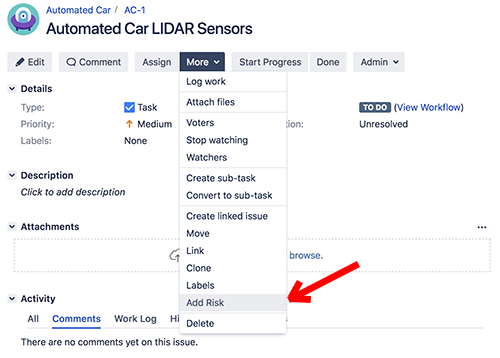
Adding a risk
In order to add risk you need to click the "Add Risk" link in the "More" issue menu, as shown
below.
Once a risk is added it will appear in the issue tab panel under the name "Risks".
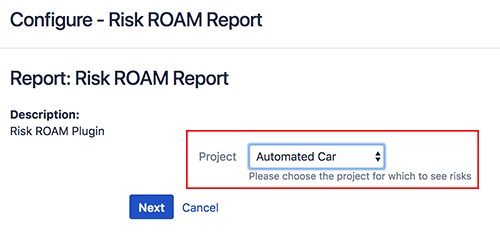
Generating reports
In order to have a global view of your project risks you need to enter the JIRA Reports
feature.
Once int the Reports selection page you should select the "Risk ROAM Report" from under the "Other" category which should be towards the bottom of the page.
Once in the "Risk ROAM Report" you will need to configure the project for which
you wish to generate a report and click the "Next" button.